 |
Tip 126: Software based Fault Tolerance (RAID-1/RAID-5) in Windows XP |  |
Fault tolerant disks in Windows XPThere is a wide choice of hard drives from established manufacturers such as
Hitachi, Maxtor, Seagate and Western Digital. For home or office use, a single
disk is usually sufficient. But for enterprise networks, a cluster of several
disks is often essential. The only problem is that these so-called RAID arrays
are not exactly cheap. A happy medium between performance and data security can be achieved by a
RAID 0+1, mirroring two RAID 0 arrays. The only downside is that the net
capacity will be split in half. As already indicated, with a few minor 'adjustments' the same software based RAID 1 and RAID 5 disk implementations are available for Windows XP Professional. In order to run RAID 1 or RAID 5 requires a hex editor (e.g.
Ultra Edit
or
XVI32 if you prefer freeware) as well as your Windows XP CD.
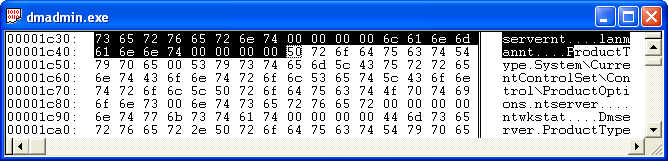
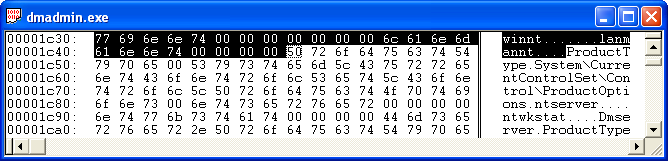
C:\windows\system32\drivers\dmboot.sys As a safety measure these files need to be copied to a separate folder from which they can be opened using your hex editor in order to change some 'indicators'.
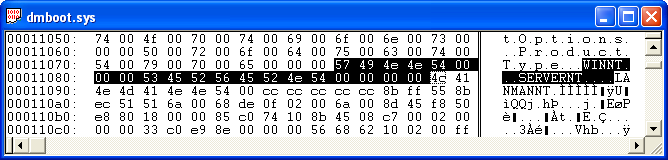
Now change WINNT...SERVERNT to SERVERNTWINNT....... 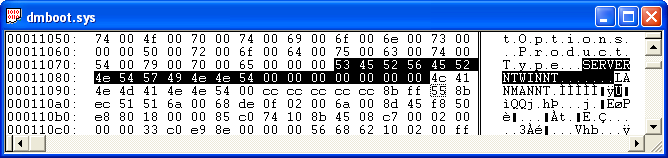
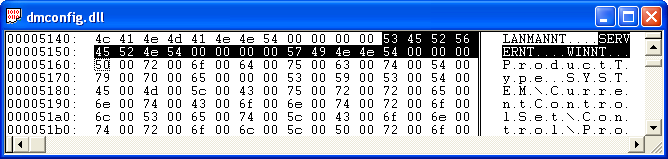
In the next file a similar change has to be made:
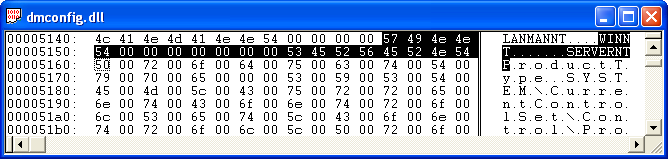
Now change SERVERNT....WINNT... to WINNT.......SERVERNT
And a similar, last, change has to be made in the third file:
Here, servernt....lanmannt has to be changed into winnt.......lanmannt.
This concludes the 'hex'-edit part of the change. As a next step the original files in the Windows\System32 directory need to
be replaced by these modified versions. However, simply exchanging the files by
overwriting them will cause the Windows File Protection mechanism to take
notice, which eventually causes Windows to restore its original files by using
the backup copies of those files.
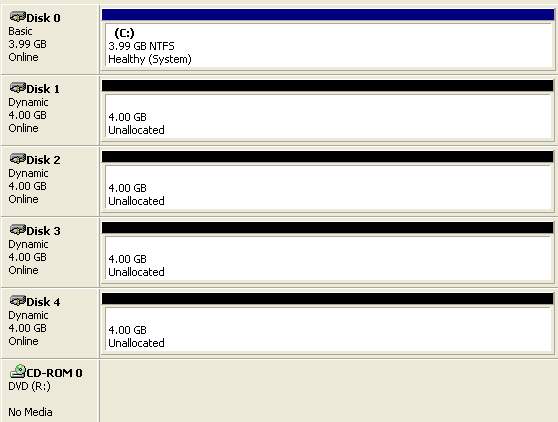
In the unlikely event that your system drive is on FAT32, simply boot any DOS operating system in order to overwrite the files manually. Since FAT32 does not provide for any security at all, I do not recommend using this file system. When your file system is running NTFS, the recommended way!, you can boot into Safe mode by pressing F8 upon startup of your system and choosing: Safe mode. Alternatively you could boot from the Windows XP CD and launch the recovery console. This can be achieved by pressing 'R' in the first selection screen. Follow the on-screen instructions when booting the recovery console. Once your system is back up you can use Windows Explorer or the command processor to copy the modified versions to their respective place. The best approach is to copy the files to the Windows File Protection (WFP) location first and after that to their original, 'run-time', place. To place them in the WFP folder, copy: dmboot.sys into <%windows%\system32\dllcache To place them in the run-time location, copy: dmboot.sys to <%windows%\system32\drivers Shut down the system and attach the extra hard disks required for the RAID implementation you want to use. Once this is accomplished, reboot your system. Now you're ready to start configuring your software based Fault Tolerant disk array. Configuring a RAID 5 array.For the following explanation on how to set up a RAID 5 array I have have chosen to use 4 (small) 4 GB disks. Of course this will work equally well with larger disks. Launch the Computer Manage console and go to the Disk Management node.
Windows Disk management recognizes the newly installed disks and will want to
Initialize them by writing a Signature to the disks. Once the Wizard has finished you will see your new disks, similar to our
example below.
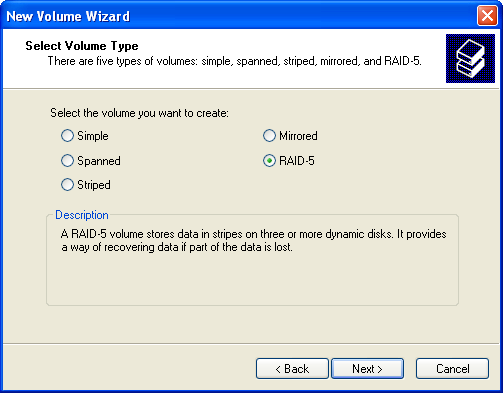
Now it's time to start creating the RAID-5 array. Right-click the Unallocated space for Disk 1 and choose: New Volume. The New Volume Wizard appears, you choose RAID-5 and click Next.
On the next screen select the Available Disks on the left, Add them to the Selected list, optionally enter the amount of space you want to use for the RAID-5 Array and click Next.
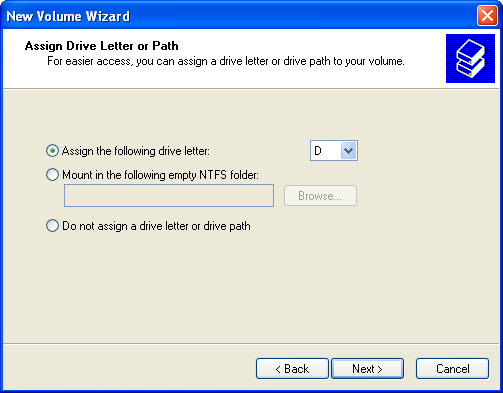
Assign the desired Drive letter for the Array and click Next.
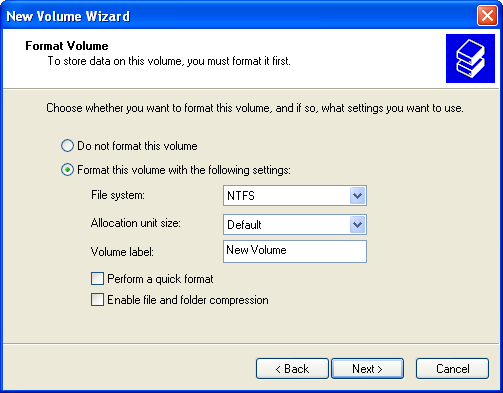
Choose the File System to be used (I strongly recommend NTFS), possibly a Volume Label for the array, check "Perform a quick format" and click Next.
As soon as Windows finishes creating the array,
the RAID 5 array will be available for use in Windows just as any other hard drive, with all
possibilities Windows and the NTFS file system provides such as the option to grant individual or group-based permissions and
to share
folders.
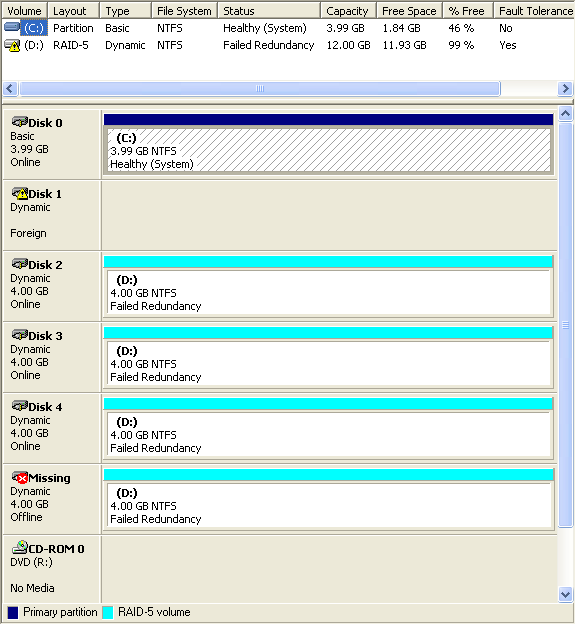
What to do if a physical drive fails?In the unfortunate event that one of the disks in this array happens to
develop a problem, the RAID-5 technology is designed to keep the system running
and guard against loss of
our valuable data. At some (convenient) point however, you may need to replace a
faulty disk with a new one.
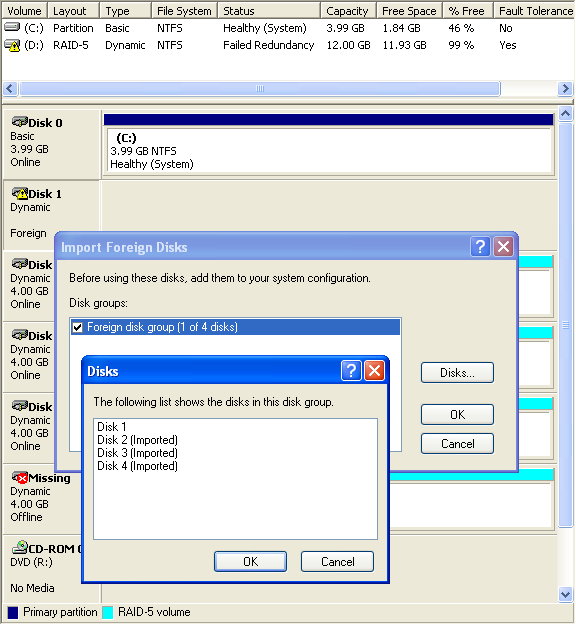
For security reasons, Windows does not incorporate the new drive into
the array automatically.
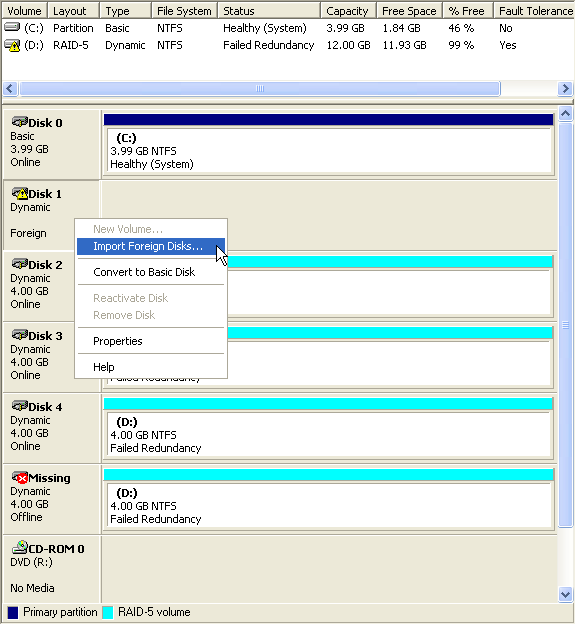
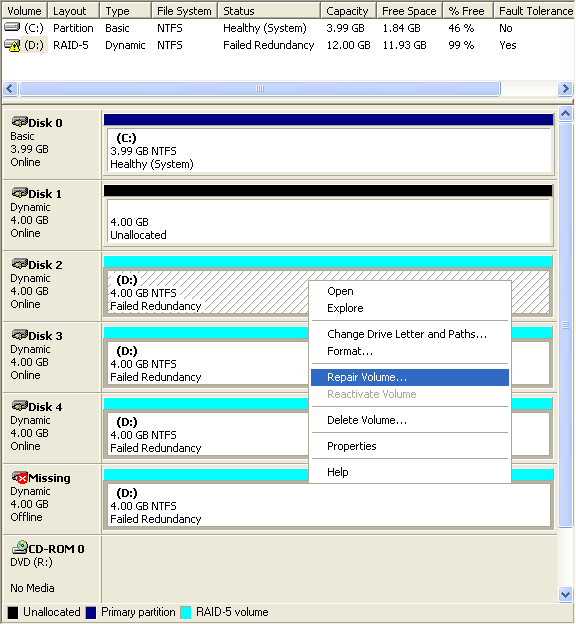
Once the new disk is successfully imported into the system the administrator can continue to repair the failed RAID-5 volume. Right-click any of the still remaining members of the RAID-5 volume and select "Repair Volume...". This will start the process of Rebuilding the RAID-5 array.
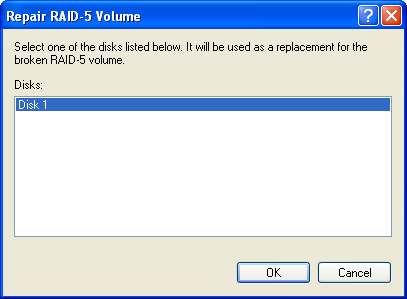
In the dialog box that follows, you select the disk that is to be used to 'complete' the RAID-5 array again. In the example there is only one disk available; the newly installed Disk 1.
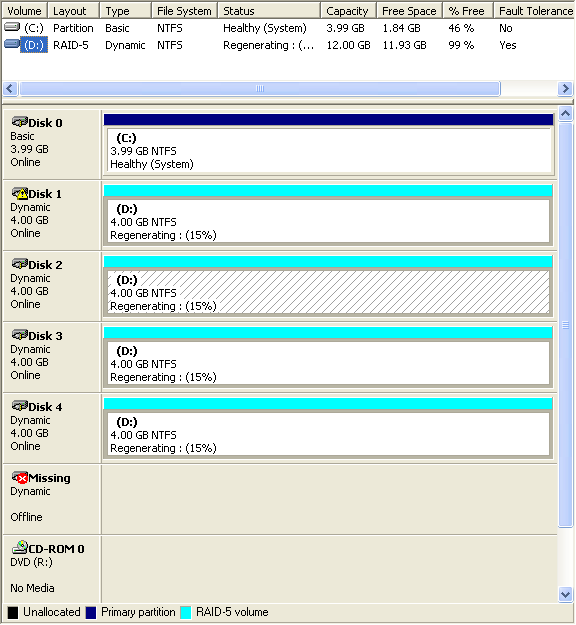
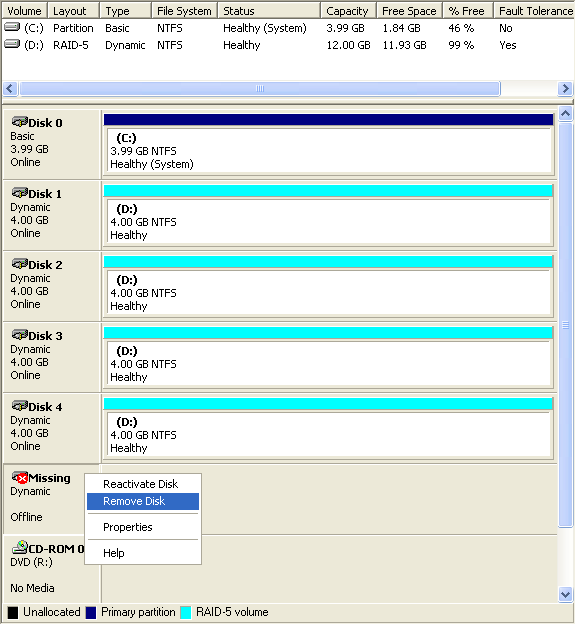
After you click the OK button a process starts that regenerates the RAID-5 array. Regeneration uses the information contained on the remaining disks to 'generate' the information needed that needs to be written to the new disk in order to reconstruct the original data contained on the failed disk. After regeneration also note the change in display for the previously 'known' Disk 4. It's purpose and setup is no longer 'known' to the system.
As a final step in this example, the 'Missing' (Offline) disk will be removed from the Disk Group information by right-clicking it and selecting 'Remove Disk'.
As you may have concluded by now, software based RAID-5 is not hard to achieve and administer. Enjoy.!
|


 |
|
 |